Приступим к самому модулю.
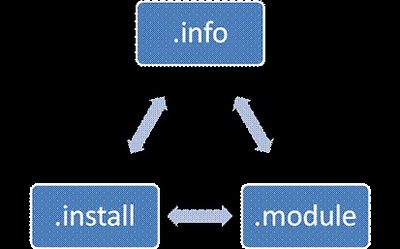
Файл textf.info (в нашем примере все файлы будут называться textf) должен содержать такие строки:
// The name of our module.
name = Text field
// Description of our module.
description = A Simple Text Field for Drupal 7
// What section will our module be in.
package = public-action fields
// Drupal version in which our module will work.
core = 7.x
// File name with which our module will work.
files[] = textf.module
// Another file that we need.
files[] = textf.install
Обратите внимание на строки
files[] = textf.module
files[] = textf.install
В Drupal 7, при создании любого модуля, всегда желательно в каждом .info файле указывать также файлы, с которыми работает модуль.
Дальше приступим к работе с файлом textf.install. Он у нас отвечает за создание в БД места для нашего поля.
/**
 * Implements hook_field_schema().
 */
function textf_field_schema($field) {
  // Return array that contains.
  return array(
    'columns' => array(
      // In column there is a textf field.
      'textf' => array(
        // Field has text type.
        'type' => 'text',
      ),
    ),
  );
 }
Как только мы создали место в БД, текст из нашего поля расположится именно в textf. Но для этого данное поле мы настроим.
Приступим к файлу textf.module.
/**
 * Implements hook_field_info().
 */
function textf_field_info() {
  // Returning array.
  return array(
    // Which is called textf.
    'textf' => array(
      // Name of our type will be 'Text field'.
      'label' => t('Text field'),
      // Description of our type.
      'description' => t('sample text field'),
      // Standart widget that will be dispalyed at once.
      // After that we choose field type.
      'default_widget' => 'textf_widget',
      // Standart that will be dispayed right after we choose field type.
      'default_formatter' => 'textf_formatter',
    ),
  );
}

/**
 * Implements hook_field_widget_info().
 */
function textf_field_widget_info() {
  // Returning array.
  return array(
    // With textf name.
    'textf' => array(
      // Our widget will be named textf label.
      'label' => t('textf label'),
      // Our widget will work with a field in DB under the name textf.
      'field types' => array('textf'),
    ),
  );
}

/**
 * Implements hook_field_formatter_info().
 */
function textf_field_formatter_info() {
  // Returning array.
  return array(
    // Name of our format for code.
    'textf_formatter' => array(
      // Dispalyed name of format.
      'label' => t('Simple text field formatter'),
      // Field in DB with which our format will work.
      'field types' => array('textf'),
    ),
  );
}
Дальше приступим к присваиванию параметров виджета. Проще говоря, мы создаем поле для ввода туда нашего поля.
/**
 * Implements hook_field_widget_form ().
 */
function textf_field_widget_form(&$form, &$form_state, $field, $instance, $langcode, $items, $delta, $element) {
  // Setting switch into parameters that wll work widget types that are in module.
  switch ($instance['widget']['type']) {
      // If parameter case is 'textf'.
      case 'textf':
        // Then we assign to textf element an array.
        // With the following values.
        $element['textf'] = array(
          // Element type 'textfield'.
          '#type' => 'textfield',
          // heading given in element settings
          '#title' => $element['#title'],
          // Widget description is given in element settings.
          '#description' => $element['#description'],
          // Our widget will have standart value textfield.
          '#default_value' => t('textfield'),
          // If element is required it will be indicated in settings of the very element.
          '#required' => $element['#required'],
          // Element location.
          // If it's indicated, value should be used, if not, value is 0.
          '#weight' => isset($element['#weight']) ? $element['#weight'] : 0,
          // Line that we'll need for the output.
          '#delta' => $delta,
      );
      break;
  }
  return $element;
}
Дальше задаем параметры отображения (его еще называют формат) нашего поля.
/**
* Implements hook_field_formatter_view().
*/
function textf_field_formatter_view($entity_type, $entity, $field, $instance, $langcode, $items, $display) {
$element = array();
// Processing format types.
switch ($display['type']) {
case 'textf_formatter':
foreach ($items as $delta => $item) {
// If we have item then.
if ($item['textf']) {
$formattedText = $item['textf'];
// Show text with tags.
$element[$delta]['#markup'] = '' . $formattedText .'
';
}
}
break;
}
return $element;
}
И заключительный шаг: надо показать Field API, что ему нужно делать в случае, если текст отсутствует. Делается это так:
/**
 * Implements hook_field_is_empty().
 */
function textf_field_is_empty($item, $field) {
   // If there's nothing in $item['textf'].
   if (empty($item['textf'])) {
     // Then we return 1, i.e. we say to Drupal that everything is fine).
     return TRUE;
     // And if it's empty, nothing will be displayed.
   }
}
Только что мы разобрали пример комплементарного модуля Field API в Drupal 7.
Вообще-то, Field API является новшеством в Drupal 7. Для реализации проектов (несложных по совему функционалу) вполне может хватить уже готовых модулей (в случае, например, с полем Email или чем-то подобным). Но если нужны поля, которых пока в проекте не существует, самое время вспомнить о Field API.